Table of Contents
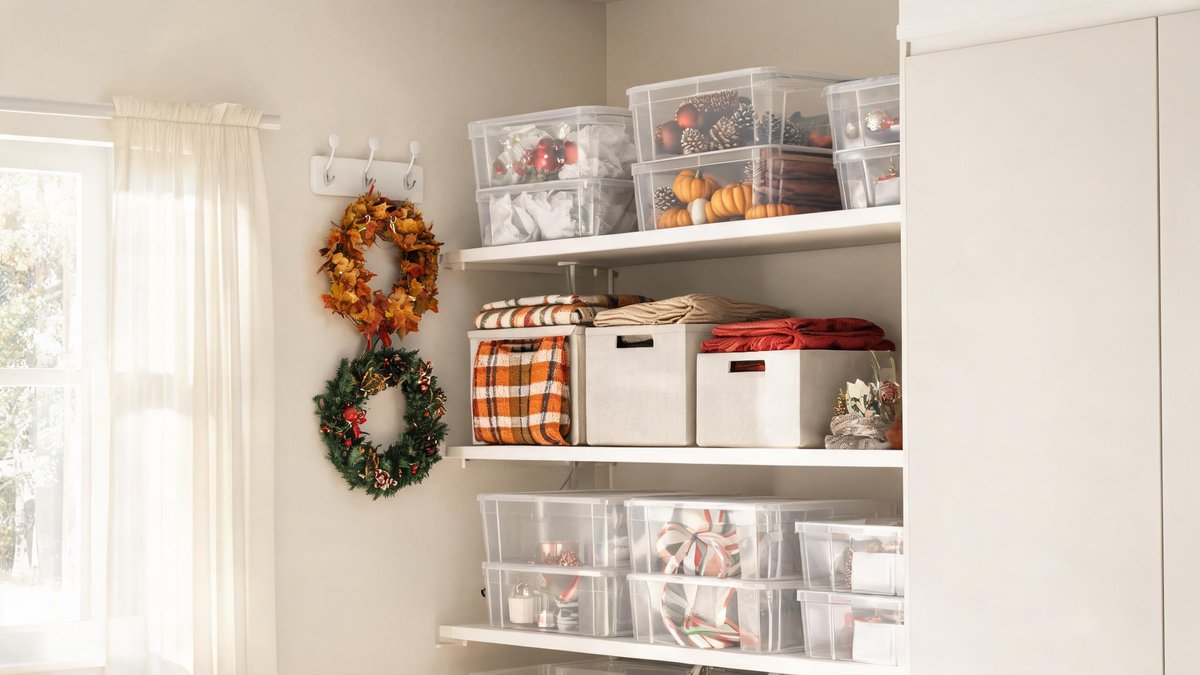
Seasonal decor brings warmth and personality to your home, but storing it can turn closets and garages into a jumbled mess. You don't need to purge the ornaments you love to recapture precious square footage. With a few smart container swaps, clever repurposing, and a fresh perspective on how you pack, you'll keep every wreath, strand of lights, and figurine in much less space. Here are the specific storage upgrades that make the biggest difference.
Ditch the Bulky Original Boxes
Ornament boxes with flimsy cardboard dividers squander shelf footprint. A set of 100 glass balls in factory packaging gobbles about 3.2 cubic feet, mostly air and thick paper trays. Transfer those same ornaments into a stackable 17-quart clear bin with adjustable dividers and you compress that down to just 1.8 cubic feet—a 44% reduction. Multiply that by all your holiday categories and you reclaim enough room for an entire extra season's worth of decor. The takeaway is simple: measure your shelf depth first, then buy clear, rectangular bins that stack flush. Skip domed lids; they waste vertical space. Use modular divider inserts so you can fine-tune compartments for different shapes. You'll spot exactly what's inside without popping a lid, and you'll stop treating empty air like it's part of your collection.
Vacuum-Seal Your Fabric Decor to Triple Vertical Space
Wreaths, tree skirts, plush stockings, and fabric garlands are sneaky space hogs. A large wreath stored in a padded bag often occupies 3.5 cubic feet. Slide that wreath—bag and all—into a jumbo vacuum-seal bag, suck out the air, and you collapse the bundle to roughly 1.2 cubic feet. That's a 65% volume drop, meaning you stack three compressed wreath sets on a shelf that previously held one. For blankets and tree skirts, standard large vacuum bags work perfectly. Just make sure the items are bone-dry before sealing to prevent must. Label the bags with a permanent marker indicating the holiday, because compressed fabric all looks the same. The practical move: invest in reusable, heavy-duty vacuum bags with a double-zip seal. You'll save at least 2 cubic feet per bag, and you'll stop watching fabric pieces balloon out to fill your bins.
Design Tip: Reseeding bare lawn patches in early fall gives grass 3 months to establish roots before winter. Spring seeding often fails because summer heat kills immature grass.
Wrap Lights Around Cardboard Templates for Tangle-Free Storage
A snarled ball of mini-lights eats time and breaks bulbs. Instead, grab a 12-inch by 18-inch rectangle of corrugated cardboard and cut a deep notch at each narrow end. Wrap your 100-light strand lengthwise around the form, tucking the plugs into the notches. The flattened coil measures under an inch thick. A tangled ball of lights consumes about 0.4 cubic feet; four wrapped cards stacked together use just 0.1 cubic foot. That's a 75% space saving, and you'll test each strand in seconds because they aren't knotted. Make templates for icicle lights and rope-light cords too. Store the cards vertically inside a slim bin, like hanging file folders. If you're short on cardboard, plywood forms last for years. The bottom line: you'll never spend 15 minutes untangling a strand again, and your bulb failure rate will drop because you aren't yanking on delicate wires.
Store Your Tree Upright in a Rolling Duffel
An artificial tree box lying flat steals valuable floor area. The standard 7.5-foot tree box claims nearly 9 square feet of garage floor. By switching to an upright rolling duffel bag, you shrink that footprint to about 6.5 square feet—roughly a 28% reduction. Many duffels also feature wheels and reinforced handles, so you can glide the tree into a narrow nook beside a shelving unit instead of hoisting it overhead. Make sure the duffel is labeled and has a sturdy base that keeps the bag vertical. If your tree sections are hinged, collapse them before sliding into the bag to avoid stress on the joints. The real win: you'll stop tripping over a wide box every time you reach for your toolbox. Bonus tip: place a desiccant packet inside to manage humidity if the tree sits in a basement or attic.
Label Sides—Not Just Tops—So You Can Stack Without Chaos
Stacking bins three or four high hides the top label instantly. The average household wastes 18 minutes per season hunting for the right holiday box, according to organizational studies. Comprehensive labeling on all four sides and the lid cuts that search time to under 3 minutes. Use a label maker with weather-resistant tape or write directly on the bin with a paint pen. Better yet, assign a specific color of duct tape to each holiday—red for Christmas, orange for Halloween, pastel green for Easter—and wrap a band around every bin of that season. You'll recognize the correct stack from across the room. Add a brief content list on the side showing priority items: "ornaments – living room," for example. The five-minute upfront labeling effort will save you genuine frustration and stop you from pulling down three wrong bins before you find the one you need.
Rethink Wreath Storage with Garment Bags
Dedicated wreath storage cases cost $15 to $25 apiece and still hog shelf real estate. A clear plastic garment bag from a dollar or big-box store runs about $3 and fits a 24-inch wreath without crushing the foliage. Hang the bagged wreath on a closet rod, a clothes rack, or a hook on the back of a door. You'll eliminate shelf boxing entirely, freeing up 2 linear feet of shelf for smaller bins. The transparency lets you identify the wreath at a glance. For added protection, slide a cardboard circle inside the bag to keep the wreath flat. If you store multiple wreaths, stagger them on a double-rod garment rack. This approach scales to garlands and swags too—just drape them over padded hangers inside a longer garment bag. The cost saving alone is noticeable; outfit your entire wreath collection this way and you'll pocket $12 to $22 per wreath, while turning dead closet air into useful storage.
Successful DIY projects share a common foundation: proper planning prevents poor performance. Before cutting any material or opening a paint can, take time to measure your space carefully, create a detailed materials list, and watch a few tutorial videos specific to your project. The most common DIY mistakes -- misaligned cuts, color mismatches, and insufficient materials -- all trace back to inadequate preparation. Create a budget that includes a 15 percent contingency for unexpected supplies or mistakes. Clear your workspace entirely before starting and lay out all tools and materials within easy reach. This preparation phase may feel tedious, but it separates professional-quality results from the frustrating outcomes that discourage people from tackling future projects.
Gardening connects you with the natural world in a way that few other home activities can match, and the benefits extend well beyond fresh produce or beautiful flowers. Working with soil exposes you to beneficial microorganisms that can boost your immune system and improve mood through direct contact with Mycobacterium vaccae, a natural antidepressant found in garden soil. Start small to avoid overwhelm -- a single raised bed or a collection of containers on a patio is plenty for a first season. Choose plants that match your local climate and sunlight conditions rather than fighting nature by trying to grow Mediterranean herbs in a shady damp yard. The most successful gardeners are those who work with their environment rather than against it, selecting varieties naturally suited to their specific conditions.
Interior design principles are surprisingly simple once you understand the basic framework that professionals use. The golden ratio of 60-30-40 applies to color distribution: 60 percent of a room should be a dominant neutral color, 30 percent a secondary color, and 10 percent an accent color used sparingly in accessories and artwork. Balance in furniture arrangement does not mean symmetry; visual weight can be distributed asymmetrically for a more dynamic and lived-in feel. Lighting should come from three sources -- ambient overhead lighting, task lighting for specific activities, and accent lighting to highlight architectural features or art. The most common decorating mistake is purchasing furniture that is too small for the space. When in doubt, size up, as oversized furniture creates a more intentional and luxurious feel than undersized pieces that leave a room looking sparse and unplanned.
Effective home organization is less about buying fancy containers and more about creating systems that match how you actually live. The principle of "a place for everything and everything in its place" only works if the places you designate are convenient enough that you will actually return items to them. Store items at the point of use -- measuring cups near the coffee station, cleaning supplies in each bathroom rather than a central closet, charging cables where you typically use your devices. The best organizational systems work with your natural habits rather than fighting them. If you tend to drop mail on the kitchen counter, put a small tray there rather than insisting on a home office filing system you will never use. Decluttering before organizing is essential because organizing clutter just creates a neater version of the same problem.
Your outdoor living space deserves the same design attention you give to your interiors. Creating distinct zones for dining, lounging, and gardening transforms a generic yard into a functional extension of your home. Hardscaping elements like patios, pathways, and retaining walls define the structure of your landscape and should be planned first before any planting begins. Choose materials that complement your home's architecture and require maintenance levels that match your lifestyle. Native plants reduce water consumption by 50 to 70 percent compared to traditional landscaping and provide essential habitat for local pollinators. A well-designed landscape can increase property value by 10 to 15 percent while reducing energy costs through strategic tree placement that provides summer shade and winter wind protection for your home.
Home energy efficiency improvements offer some of the best returns on investment available to homeowners. Air sealing and insulation upgrades typically pay for themselves within two to three years through reduced utility bills. The attic is the most important area to address because heat rises and escapes through insufficiently insulated ceilings. Programmable or smart thermostats reduce heating and cooling costs by 10 to 15 percent by automatically adjusting temperatures when you are asleep or away. LED bulbs use 75 percent less energy than incandescent alternatives and last up to 25 times longer. Before investing in expensive renewables like solar panels, maximize your home's energy efficiency first; a well-insulated and air-sealed home requires a much smaller and more affordable solar system to meet its energy needs than a drafty, inefficient one.