Table of Contents
Key Takeaways
- Professional-quality paint jobs depend more on proper preparation and technique than on expensive tools or materials
- Surface preparation including cleaning, patching, sanding, and priming accounts for roughly 80 percent of the total time required for a painting project
- High-quality paint with the right sheen for each surface type provides better coverage and durability, reducing the number of coats needed
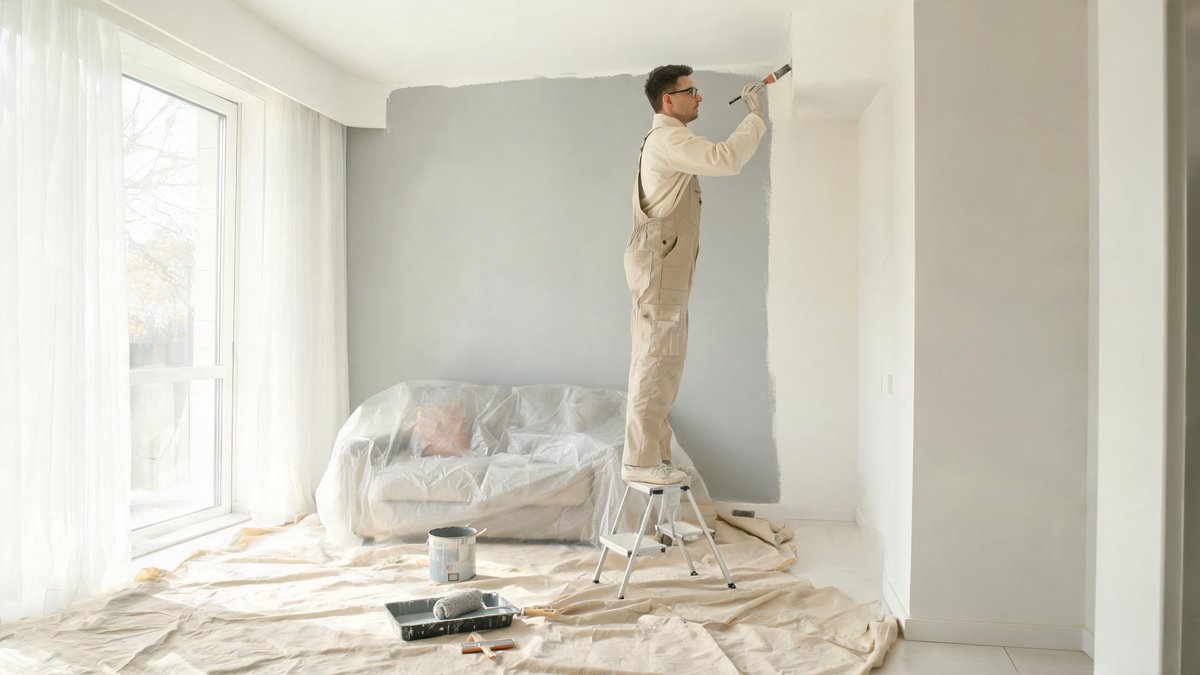
- Cutting in edges with a high-quality angled brush before rolling large sections prevents lap marks and produces crisp, clean lines
- Patience between coats, proper ventilation, and thorough cleanup ensure a lasting finish that looks fresh for years
Essential Tools and Materials for a Professional Finish
The quality of your painting tools directly affects the quality of your finished walls. Investing in good brushes and rollers makes a more significant difference than buying premium paint. A high-quality 2.5-inch angled sash brush is essential for cutting in around trim, windows, and ceilings. The angled bristles allow precise control and create clean lines without taping every surface. Look for brushes with nylon and polyester blend bristles, which hold their shape and release paint evenly across all types of latex paint. Avoid cheap brushes with stiff, uneven bristles that leave visible brush marks and shed bristles into your finish.
Roller selection matters just as much as brush quality. A 9-inch roller frame with a thick nap cover (half-inch to three-quarter-inch depending on wall texture) provides smooth, even coverage on most interior walls. Microfiber roller covers hold more paint and release it more evenly than traditional lamb's wool or synthetic alternatives. You also need a roller tray with a textured bottom surface for loading the roller evenly, a paint stirrer, a 5-in-1 painting tool for opening cans and cleaning rollers, blue painter's tape, drop cloths, and a sturdy step ladder. Do not skimp on drop cloths: canvas drop cloths stay in place better than plastic sheeting and absorb drips instead of spreading them across your floors.
For the paint itself, choose a premium brand such as Benjamin Moore, Sherwin-Williams, or Behr. Premium paints contain higher concentrations of pigments and binders, providing better coverage in fewer coats and greater durability over time. A gallon of premium paint typically covers 350 to 400 square feet, so measure your wall area carefully before purchasing. According to the Wikipedia article on paint, modern latex paints offer excellent adhesion, fade resistance, and washability, making them the preferred choice for most interior applications.
Preparing Your Room for Painting
Preparation is the most critical phase of any painting project and should take roughly 80 percent of your total time. Begin by removing all furniture from the room or moving it to the center and covering it with plastic sheeting. Remove outlet covers, switch plates, curtain rods, and any hardware attached to the walls. Lay canvas drop cloths over the entire floor, overlapping edges by at least 12 inches and securing them with painter's tape along the baseboards. Tape off trim, window frames, door frames, and ceiling edges using blue painter's tape designed for clean removal without damaging existing paint.
Next, clean all wall surfaces thoroughly. Grease, dust, cobwebs, and grime prevent paint from adhering properly and cause peeling and bubbling later. Wash walls with a mild detergent solution and a sponge, rinsing with clean water and allowing the walls to dry completely. Fill holes and cracks with spackling compound using a putty knife, applying it slightly above the surface and sanding it flush once dry. Sand any glossy or previously painted areas with fine-grit sandpaper (120 to 150 grit) to create a slightly rough surface that new paint can grip. Wipe away all sanding dust with a tack cloth or damp rag before priming.
Priming is essential for several situations: covering dark colors with lighter ones, painting over patched areas, painting new drywall, and preventing stains from bleeding through. A quality primer provides a uniform surface for the paint to adhere to, improves coverage, and often reduces the number of finish coats required. Use a stain-blocking primer for water stains, smoke damage, or marker marks on walls. Allow the primer to dry completely according to the manufacturer's instructions before applying your first coat of paint.
Choosing the Right Paint and Sheen
Paint sheen refers to the level of gloss or shine in the finished surface, and choosing the right sheen for each room is as important as selecting the right color. Flat or matte paint has no shine and hides wall imperfections better than any other sheen, making it ideal for low-traffic areas such as formal living rooms, dining rooms, and adult bedrooms. However, flat paint shows scuffs and marks easily and is difficult to clean, so it is not suitable for high-traffic areas or homes with children and pets.
Eggshell and satin finishes offer a subtle sheen that balances appearance with durability. Eggshell has a very low luster similar to the surface of an eggshell and works well in living rooms, hallways, and family rooms where moderate traffic and occasional cleaning are expected. Satin has a slightly higher sheen and better washability, making it a popular choice for kitchens, bathrooms, and children's rooms. Semi-gloss paint has a noticeable shine and excellent durability, making it ideal for trim, doors, cabinets, and high-moisture areas. High-gloss paint is the most durable and easiest to clean, but it reveals every surface imperfection, so it is typically reserved for doors, cabinets, and accent features.
Color selection should account for the room's natural light, size, and intended mood. Lighter colors make small rooms feel larger and more airy, while darker colors add warmth and coziness to large spaces. Test paint colors on a large piece of foam board or directly on the wall in a 2-foot square section, observing how the color looks at different times of day and under artificial lighting before committing to the full room.
Mastering Painting Techniques
The most important painting skill to master is cutting in, which means painting the edges where walls meet ceilings, corners, and trim without using tape. Load your angled brush with a moderate amount of paint and gently tap both sides of the bristles against the inside of the can to remove excess. Hold the brush like a pencil at a 45-degree angle to the surface and use the flat edge of the bristles to create a straight line along the ceiling edge. Work in sections of 3 to 4 feet at a time and maintain a wet edge to prevent visible seam lines. This technique takes practice but produces cleaner results than taping and saves significant time.
Rolling paint onto walls requires the right technique for even coverage. Pour paint into the roller tray and load the roller cover by rolling it through the paint, then rolling it back and forth on the textured section of the tray to distribute paint evenly. Apply paint to the wall in a W or M pattern, then fill in the pattern with parallel strokes without lifting the roller. This technique distributes paint evenly and prevents roller marks. Work in sections of roughly 4 feet square, blending each section into the previous one while the paint is still wet. Apply paint with moderate pressure, letting the roller do the work rather than pressing hard into the wall.
Most walls require two coats of paint for full coverage and uniform color. Allow the first coat to dry completely, typically 2 to 4 hours depending on humidity and temperature, before applying the second coat. Lightly sand any raised bumps or drips between coats with fine-grit sandpaper and wipe away the dust before painting. Maintain consistent temperature and ventilation throughout the project: ideal painting conditions are between 60 and 80 degrees Fahrenheit with moderate humidity and good airflow.
Common Painting Mistakes and How to Avoid Them
Even experienced DIY painters make mistakes, but most are easily preventable. One of the most common errors is using too much paint on the brush or roller, which causes drips, sags, and uneven coverage. Load your tools with moderate amounts of paint and apply thin, even coats rather than trying to cover the surface completely in one pass. Another frequent mistake is painting over dirty or damp walls, which leads to adhesion failure and peeling. Always clean and dry the surface completely before applying any paint or primer.
Not using enough painter's tape or removing it too late creates ragged edges and peeled paint. Apply tape firmly along the edge you want to protect, pressing it down with a putty knife to ensure no gaps exist. Remove the tape while the paint is still slightly wet, pulling it back at a 45-degree angle for a clean edge. Leaving tape on for more than 24 hours makes removal difficult and increases the risk of pulling dried paint off the wall. Lap marks, visible bands where painted sections overlap, occur when you do not maintain a wet edge. Work continuously across the wall surface, completing each wall section before taking a break.
Finally, do not rush the drying process between coats or before removing painter's tape. Low temperatures, high humidity, and poor ventilation all extend drying times significantly. Use fans and open windows to improve airflow, but avoid directing fans directly at painted surfaces, which can cause uneven drying and texture problems. Following the manufacturer's recommended drying times, even when the surface feels dry to the touch, ensures proper curing and long-lasting results.
Cleanup and Post-Painting Care
Proper cleanup extends the life of your painting tools and ensures they are ready for your next project. Clean brushes and rollers immediately after use. For latex paint, wash tools with warm soapy water, working the soap through the bristles and rinsing until the water runs clear. Use a brush comb or your fingers to remove all paint from deep within the bristles. Spin rollers in a bucket or squeeze them with a scraper tool to remove water, then stand them on end to dry completely. Store clean, dry brushes in their original packaging or wrapped in craft paper to maintain bristle shape.
Dispose of paint responsibly. Leftover latex paint can be stored for touch-ups if sealed properly: place plastic wrap over the can opening before tapping the lid closed to create an airtight seal. Label the can with the room name and date for future reference. For disposal, dry out small amounts of paint by leaving the can open in a well-ventilated area away from children and pets. Never pour paint down drains or into household trash without drying it first. Many communities offer paint recycling programs for proper disposal of unwanted paint.
Newly painted rooms require gentle care during the first few weeks while the paint fully cures. Avoid scrubbing or cleaning walls for at least 30 days after painting. When cleaning becomes necessary, use a soft sponge with mild soap and water, using gentle circular motions rather than aggressive scrubbing. Touch up any scuffs or marks by applying paint with a small brush only to the affected area, feathering the edges to blend with the surrounding surface. With proper preparation, technique, and care, a professionally painted room maintains its beauty for 5 to 10 years before needing a refresh.